Accept phone calls without touch in your android phone
Application Name:Air Call-Accept
Description
With this app, you can effortlessly answer or reject your phone calls without even touching it!
Using the proximity sensor on your phone,
it detects when you wave your hand over the screen or when you place
the phone to your ear.
Especially useful for drivers with a bluetooth headset, it means you
don't have to fiddle around trying to press the correct button, leaving
you to concentrate on the road.
If you don't use a bluetooth headset, you can automatically turn
speakerphone on to answer calls within the settings, again making life
easier on the road.
Key features:
Hello guys now from this site you can download
Google play APK (Nonpaid/Free) link file from online.Just copy link
& paste it to this site.i will leech your file from play store &
you can get direct download link.Follow the instructions below...
Added Unlock Bootloader for a range of Sony Xperia devices
Octoplus/Octopus Suite v1.2.6 Release Notes
- Sony Xperia C1504 - added Unlock Bootloader (fastboot), improved* Direct Unlock and Repair IMEI operations.
- Sony Xperia C1505 - added Unlock Bootloader (fastboot), improved* Direct Unlock and Repair IMEI operations.
- Sony Xperia C1604 - added Unlock Bootloader (fastboot), improved* Direct Unlock and Repair IMEI operations.
- Sony Xperia C1605 - added Unlock Bootloader (fastboot), improved* Direct Unlock and Repair IMEI operations.
- Sony Xperia ST21a - added Unlock Bootloader (fastboot), improved* Direct Unlock and Repair IMEI operations.
- Sony Xperia ST21i - added Unlock Bootloader (fastboot), improved* Direct Unlock and Repair IMEI operations.
- Sony Xperia ST21a2 - added Unlock Bootloader (fastboot), improved* Direct Unlock and Repair IMEI operations.
- Sony Xperia ST21i2 - added Unlock Bootloader (fastboot), improved* Direct Unlock and Repair IMEI operations.
- Sony Xperia ST23a - added Unlock Bootloader (fastboot), improved* Direct Unlock and Repair IMEI operations.
- Sony Xperia ST23i - added Unlock Bootloader (fastboot), improved* Direct Unlock and Repair IMEI operations.
- Sony Xperia ST23a2 - added Unlock Bootloader (fastboot), improved* Direct Unlock and Repair IMEI operations.
- Sony Xperia ST23i2 - added Unlock Bootloader (fastboot), improved* Direct Unlock and Repair IMEI operations.
- Sony Xperia ST26a - added Unlock Bootloader (fastboot), improved* Direct Unlock and Repair IMEI operations.
- Sony Xperia ST26i - added Unlock Bootloader (fastboot), improved* Direct Unlock and Repair IMEI operations.
Octoplus/Octopus Server Credits Consumption:
for users WITH Octopus/Octoplus/Medusa card - "0" credits (FREE) per "Unlock Bootloader" operation;
for users WITHOUT Octopus/Octoplus/Medusa card - "2" credits per "Unlock Bootloader" operation.
Note! * from now on, after "Direct Unlock" and/or "Repair IMEI" operations, it is possible to write firmware
for mentioned above devices with any known Sony servicing tool that uses original Sony loaders;
also phone's fastboot (bootloader) will be unlocked.
** to write firmware with any known Sony servicing tool that uses original Sony loaders for
mentioned above devices, which were serviced (unlocked or have repaired IMEI) by previous
Octoplus/Octopus Suite Software versions, you need to perform "Unlock Bootloader" operation.
v1.65
1.Add compatible for USB3.0 port
2.SPD Add 8825  write for *.gz package
3.SPD Modify ADB ROOT
4.Coolsand Modify pinouts-scan
5.SPD Modify a bug for searching IMEI from file
China Samsung i9500 s4,i9082 grand 4.2.2 copy imei solution
i9500 s4 mtk 6575 4.2.2
Engineer menu code - * # * #889988# * #*
also try this * #889988# * #*
open gprs option and write imei
or
After
CDS Information
After
Radio Information
Then, for SIM1
Phone1
After
IMEI number of the phone that you scrap
AT + EGMR = 1.7, "123456789012345" (without the quotation marks will be exactly in the same way)
After
Pressing and changing IMEI number Send Command in at
For Sim2
Phone2
After
IMEI number of the phone that you scrap
AT + EGMR = 1.10, "123456789012345" (without the quotation marks will be exactly in the same way)
After
Pressing and changing IMEI number Send Command in at
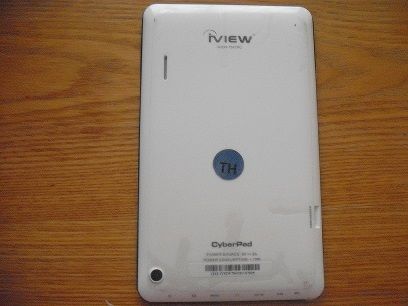
the factory firmware download site is very informative and does support
several other iview models but has terrible download speeds so I have
mirrored the new firmware update from the iview support site to make
this update process much smoother for you for the same model I have
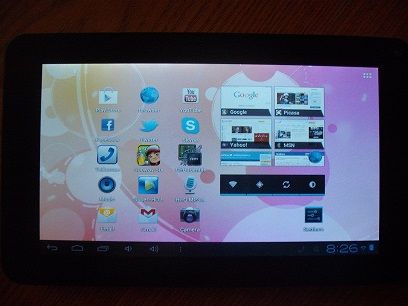
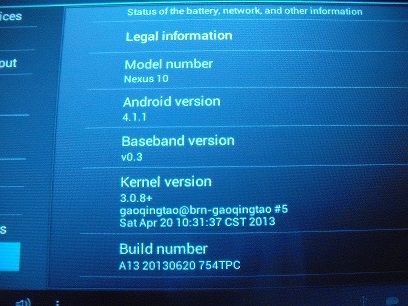
after the update the only thing changed is the android version - the
home screen and wallpaper is same as 4.0 pics but the device being
Jelly Bean does have several more features and usb debugging is set to
on automatically in this updated firmware
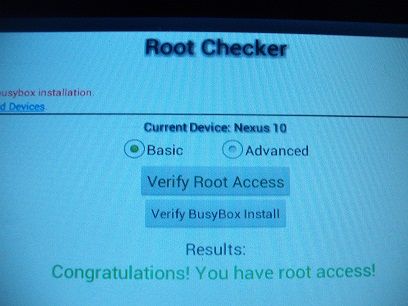
now you can use the Uberizer and totally customize the device to your
likings - here is a teaser for you of what the new v1.7 Uberizer [soon
to be released] can do to it
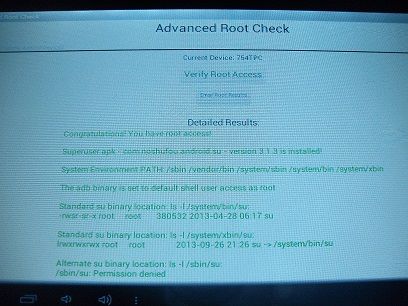
full root using option 'c' then '17' in Uberizer
nexus 10 for extended app compatibility - new added feature only available in the new upcoming Uberizer v1.7 release
With
this release we've added Unlock via FTM-mode for a wide range of
Qualcomm based ZTE smartphones, added Unlock support for new firmware
version for Motorola MB520 and much more...
1. Added Unlock via FTM-mode for the following ZTE models: ♦ Blade III Pro
♦ Blade E / V956
♦ Blade G
♦ Blade V
♦ Cosmote Xplore
♦ N880G
♦ N880F
♦ N881F
♦ N881E
♦ TWM Amazing A2
♦ V880G
♦ V889F
♦ V955 From now on you can unlock those devices via 2 modes:
either via download mode, or via FTM mode (much faster).
Repair IMEI via download mode only.
2. Fast Direct Unlock / Repair IMEI database updated with: ♦ ZTE Blade: TM_P729TV1.0.0B07
♦ ZTE V880e: GB_ENTEL_P772A11V1.0.0B05
TI Platform Update:
Added Unlock support for new firmware version for: ♦ Motorola MB520: KOBE_U3_5.35.0
MTK Platform Update:
Following devices added to the list of supported: ♦ NGM Forward Infinity (MT6589)
♦ Clockphone Rider M810 (MT6525)
♦ BLU Jenny TV T172T (MT6525)
Everyone has their own dreams.
We're helping you to turn them into goals and therefore make 'em a reality!
Software Name: BlackBerry Link v1.2.1.31 (Windows OS) File
Name: 121_b023_multilanguage.exe Download Size: 157 MB
Published Date: 11/12/2013
Software Download for BlackBerry Support
Downloading BlackBerry Link v1.2.1.31 (Windows OS) indicates a required field
Would you like to receive information about RIM and/or
BlackBerry products and/or services from RIM or authorized third
parties selected by RIM?
Yes No
GPGIndustries Proud To Present You Our New Update GPGJtag V2.48. GPGJtag V2.48,added support for Huawei and LG phones! GPGJtag V2.48 Release Notes: Added support for the following models: Huawei C8950D Boot Repair.LG F200K Boot Repair.LG F220K Boot Repair. Download GPGJtag V2.48 ->
2) Format your SD card in FAT32(NO NEED TO FORMATE IF ITS ALREADY FAT32)
3) create a folder "dload" off course without the quotes on to the root of your SD card.
4) Extract the UPDATE.APP from the stock ROM and place it in "dload"
5) Power off your phone with sd card inside.
6)
Power on by pressing POWER+VOLUME UP+VOLUME DOWN Button if done
properly you will see progress bar saying UPDATING! after its done it
will reboot automatically
Octoplus/Octopus Team as always is on the guard of its users demands, satisfying as
many of them as possible, so here it is - new, hot and fresh version of Suite Software!
Octoplus/Octopus Suite v1.2.5 Release Notes
Credits consumption changed! From now on, Unlock and Repair IMEI of Sony devices
for SE Unlimited Activation owners will cost only 4 credits!
Improved Unlock operation for Sony Xperia ST26a and Sony Xperia ST26i.
Here’s step by step tutorial on how to upgrade Samsung Galaxy Note to ICS Rocket ROM XXLRK firmware.
It is possible to upgrade your Galaxy Note to more recent ROM which
is based on Android 4.0.4 ICS version. This new firmware is known as
XXLRK RockerROM which is much faster, stable and efficient than the
older version. This is a very famous custom firmware which is available
for Galaxy Note compatible with Android 4.0.4 firmware version. The
important features of this custom ROM include:
Firmware is based on XXLRK official firmware
Runs on Kernel Notecore 8.1
Very good animation and 4-way power menu
Native call recording option with Complete VOIP support.
Dark theme and Appwidget picket
Rolle Tube app which allows you to download videos from YouTube
SVoice App – Voice assistant from Samsung
Transparent widget for weather
Improved SMS App without any contact limits
Beats Audio
Includes playstation certificate
Live wallpapers, Swype, Google Keyboard, Auto-backup etc.
Pre-Requisites
In order to go through installation process you are required to have below prerequisites.
1. You device must be rooted using Clockworkmod recovery tool.
2.Backup all important data including Contacts, SMS, mails, documents
etc. from your phone using Android backup software. You can use Google
Sync to backup all contact data including mails. You can backup messages
using WhatsApp messages. Also backup your APN settings including MMS,
3G and GPRS settings.
3. USB debugging should be enabled on your device. This can be done by going to Settings -> Applications -> Developers and enable USB debugging.
4. Download the latest USB drivers for your Samsung phone from the official website at,
5. Charge your phone at least 90 percent so that it does not powered
off in middle of installation process. If your phone gets powered off in
middle, it might become dead completely and it will be impossible to
recover your phone.
6. Disable the firewalls and other security software that could
interrupt the installation process and damage your phone completely.
7. The device should be factory unlocked so that you can root it and install custom firmware.
8. You should be aware that we are not responsible for any damages
caused to your device accidentally because of any mistake during
installation process. Also understand that custom ROM installation will
deprive you of warranty rights provided for your phone.
Installation Procedure
Follow the below installation steps mentioned in the tutorial to
upgrade your Galaxy note to XXLRK RockRom firware with Android 4.0.4
ICS.
Once your phone is rooted, just make sure you have enough space in
your phone’s cache memory for installing this ROM by doing a Dalvik
Cache wipe to erase all temporary data in the cache.
Your phone will not be detected with Samsung KIES in CM9 RCI since it’s custom ROM.
Install ClockwordMod recovery on your phone before beginning the installation process.
Download the XXLRK RocketROM custom firmware to your Desktop and connect your phone to Desktop with USB cable.
Now copy the downloaded firmware in zip file to your phone’s memory card. Now turn off the phone and disconnect it from your PC.
Restart the phone and go to recovery mode by pressing and holding the Power, Volume Up and Home buttons together.
First erase all the data on your device with ClockWorkMod recovery tool and choose the “Flash Zip from SD Card” option from the menu and press the power button.
The installation process will begin now and it will take around
10-15 minutes for completion. Once the installation is done the phone
will reboot automatically and it will load with new firmware.
You can go to the Settings-> About Phone -> Firmware Version to verify that you have upgraded to latest firmware.
The same installation procedure can also be done through Odin tool
without using ClockWorkmod recovery but its little complicated than
above procedure.
Here in this post we will guide you how to increase the internal memory of Samsung Galaxy Y S5360. Here’s the complete details:
The age that witnessed the
use of external memory has certainly been transformed to a time that has
integrated memory internally in phones. Most new phones that hit the
markets these days do not come with external memory slots. Rather, smart
phone companies are releasing high end models that have mammoth
internal memory space.
It is quite expected to
consider the fact that technology has been advancing at astronomical
rates. Even if, phones do provide for expansion of memory, they come
with large internal memory capacities. The approach was based on a
provision for user friendly features in current day smart phones.
Let us now look at how to increase the internal memory capacity in
the Samsung Galaxy Y S5360. It is amongst the most popular models and
the phone was first among entry level smart phones that were developed
on the android platform. As being one of the first android phones to hit
the markets, the phone wasn’t intended to be integrated with a large
memory capacity.
Instead, the phone’s makers concentrated on enhancing productivity by
making it compatible with the popular android platform. AS such, the
phone’s internal memory is only 160 MB. Now here is the exciting part.
You can actually increase the phone’s internal memory thereby making
enough and more room for the apps and games you wish to download and
play.
Here’s the catch. Using the external memory by fitting a memory card
on the slot is a different thing. Here, by following a few steps, it is
possible to increase the internal memory of your phone actually. Here
are the steps you are required to follow:
Step 1
Rooting the phone
You need to root your Samsung galaxy Y using a root file. The
technique of rooting is quite easy, steps for which are widely available
to the internet.
Step 2
Creation of a partition
The second step involves the creation of a partition. You must
partition your memory card or micro SD card, whatever the phone uses.
The Galaxy S comes with a micro SD slot, so that is what has to be
partitioned.
Step 3
Execution of Partitioning
The third step involves executing the necessary partitioning.
Partitioning of the card on the phone is different from what is done in a
desktop computer or a laptop for that matter. In order to achieve
partitioning, you have to install software known as MiniTool. There are
many software that are available in the market that perform
partitioning. But for now, let’s just stick with MiniTool.
Once the download of the partition wizard is accomplished, go ahead and run the application after installing the same.
Step 4
This step involves the achievement of partitioning without the loss
of information. Partitioning could be sometimes resulting in loss of
valuable data. It is advisable to store a backup of crucial information.
If yours is a new version of the micro SD, you are good to go without
creating a backup. It is necessary to read everything you agree to while
following the steps. Proceeding with a little forethought is
recommended.
Step 5
Next, plug your phone to the system, Select the fat32 file system
option ad click on apply. Once that is done, you can edit the micro SD
and click on re-size. You can re-size to whatever capacity you wish
(depending on the capacity of your card that is).
Step 6
You’ll get the MiniTool window. Choose the EXT3 file system and click on apply.
Step 7
Next, you’ll need to install the link2sd application. Run the
application, follow the instructions, reboot your device and you are all
good to go.
In this tutorial
we will guide you step-by-step on how to install CyanogenMod 10 Android
4.1 Jelly Bean ROM on Samsung Galaxy S Duos S7562.
CyanogenMod 10 Android v4.1 Jelly Bean provides an immense
exhilaration to those users desiring to enjoy the features of Jelly Bean
4.1 ROM. CyanogenMod, also known as simply CM, is undoubtedly the most
greatly acknowledged unauthorized Android firmware, and day-by-day they
are increasing their compatibility with numerous old and freshly
arriving Android devices from different manufacturers, including our
Samsung Galaxy S Duos S7562. Many reviews show that CyanogenMod provides
much more facilities than the official Android firmware. Installing
CyanogenMod 10 Android 4.1 Jelly Bean on your Samsung Galaxy S Duos
S7562 will enable its user to sustain in the Jelly Bean environment.
So in this tutorial we will be showing you an installation guide
regarding using CyanogenMod 10 Jelly Bean 4.1 ROM on Samsung Galaxy S
Duos S7562. Just follow the simple steps given below:
Disclaimer
This tutorial will definitely work when using Samsung Galaxy S
Duos S7562 only. While working of it on others is not yet confirmed. On
applying this installation to another model or device may give an
unwanted result. While applying this update we will not be responsible
if anything occurs to your device, so continue at your own risk.
Pre-Requisite
For successful completion of this rooting process charge your phone up to a minimum of 75% battery.
You must take a back-up of all your personnel items and other
impotent data, such as Call Logs, SMS, Contacts, Audios, Images, Videos,
APN (Access Point Names) settings, Bookmarks, MMS settings, on your
phone.
One must install a custom recovery image particularly for his
Android device. To do this, ClockworkMod Recovery should be downloaded
using the Internet.
If you have not, then you must unlock your Android device’s
Bootloader. But due to unlocking of Bootloader, your Android device may
lose its official Warranty. So to overcome this, download fastboot from
Internet.
Steps for installing CM10 Android 4.1 Jelly Bean ROM for Samsung Galaxy S Duos S7562
Step 1
From your Android device disconnect & remove the memory card and
insert it in your Computer using a card reader. You must not use USB
cable, since CyanogenMod do not work properly through USBs.
Step 2
Now do repartition of memory card, by just doing right click on the existing partition, choose Resize
option, and then apply the sufficient amount of space towards your new
partition. Make your new partition as your primary partition of Ext4
file system. Press the Apply option & remove your memory card now.
Step 3
Using the Internet, download: CM10 Android 4.1 Jelly Bean ROM for Samsung Galaxy S Duos S7562.zip
file and Google Apps in your Computer. Again reinsert it in the PC and
then copy the above downloaded zip file in a folder named as “root” under your SD Card. Don’t run or try to open this file, just copy it in the folder.
Step 4
Now, remove your memory card from the Computer. Then shut-down your
Android smartphone and then again insert back memory card in the phone.
Step 5
Now, enter into the Recovery Mode. For this just press the Down Volume & Home button simultaneously, and while pressing these buttons press down your Power button at the same time.
Step 6
Since you are now in the Recovery Mode, select the “install zip from SD card” option, and then select the “choose zip from SD card” option to browse into your SD Card. Now, navigate up to the downloaded “CM10 Android 4.1 Jelly Bean ROM for Samsung Galaxy S Duos S7562.zip” file for flashing it on your phone.
Step 7
Now get yourself back to the main menu by pressing back button and then reboot your Android phone.
Step 8
After this, you’ll have CyanogenMod 10 ROM installed over your Samsung Galaxy S Duos S7562.
Finished!
————————————————————————————————————————————————–
Update: The link for downloading CyanogenMod 10 ROM
has been removed from this tutorial as it had become a ‘dead link’
after sometime(as reported by many of our site readers!). Keep checking
back our site as we will soon be updating the new working link for
downloading the ROM.
In this tutorial
we will guide you step-by-step on how to install CM10.1 Android 4.2.1
Jelly Bean ROM on Samsung Galaxy S3 I9300.
CyanogenMod 10.1 Android v4.2.1 Jelly Bean provides an immense
exhilaration to those by Samsung Galaxy S3 I9300 users desiring to enjoy
the features of Jelly Bean 4.2.1 ROM. CyanogenMod, also known as simply
CM, is undoubtedly the most greatly acknowledged unauthorized Android
firmware, and day-by-day they are increasing their compatibility with
numerous old and freshly arriving Android devices from different
manufacturers., including our Samsung Galaxy S3 I9300. Many reviews show
that CyanogenMod provides much more facilities than the official
Android firmware. Installing CyanogenMod 10.1 Android 4.2.1 Jelly Bean
on your Samsung Galaxy S3 I9300 will enable its user to sustain in the
Jelly Bean environment.
So in this tutorial we will be showing you an installation guide
regarding using CyanogenMod 10.1 Jelly Bean 4.2.1 ROM on Samsung Galaxy
S3 I9300. Just follow the simple steps given below:
Disclaimer
This tutorial will definitely work when using Samsung Galaxy S3 I9300
only. While working of it on others is not yet confirmed. On applying
this installation to another model or device may give an unwanted
result. While applying this update we will not be responsible if
anything occurs to your device, so continue at your own risk.
Pre-Requisite
For successful completion of this rooting process charge your phone up to a minimum of 75% battery.
You must take a back-up of all your personnel items and other
impotent data, such as Call Logs, SMS, Contacts, Audios, Images, Videos,
APN (Access Point Names) settings, Bookmarks, MMS settings, on your
phone.
One must install a custom recovery image particularly for his
Android device. To do this, ClockworkMod Recovery should be downloaded
using the Internet.
If you have not, then you must unlock your Android device’s
Bootloader. But due to unlocking of Bootloader, your Android device may
lose its official Warranty. So to overcome this, download fastboot from
Internet.
Steps for installing CM10.1 Android 4.2.1 Jelly Bean ROM on Samsung Galaxy S3 I9300
Step 1
From your Android device disconnect & remove the memory card and
insert it in your Computer using a card reader. You must not use USB
cable, since CyanogenMod do not work properly through USBs.
Step 2
Now do repartition of memory card, by just doing right click on the existing partition, choose Resize
option, and then apply the sufficient amount of space towards your new
partition. Make your new partition as your primary partition of Ext4
file system. Press the Apply option & remove your memory card now.
Step 3
Using the Internet, download: CM10.1 Android 4.2.1 Jelly Bean ROM for Samsung Galaxy S3 I9300.zip
file and Google Apps in your Computer. Again reinsert it in the PC and
then copy the above downloaded zip file in a folder named as “root” under your SD Card. Don’t run or try to open this file, just copy it in the folder.
Step 4
Now, remove your memory card from the Computer. Then shut-down your
Android smartphone and then again insert back memory card in the phone.
Step 5
Now, enter into the Recovery Mode. For this just press the Down Volume & Home button simultaneously, and while pressing these buttons press down your Power button at the same time.
Step 6
Since you are now in the Recovery Mode, select the “install zip from SD card” option, and then select the “choose zip from SD card” option to browse into your SD Card. Now, navigate up to the downloaded “CM10.1 Android 4.2.1 Jelly Bean ROM for Samsung Galaxy S3 I9300.zip” file for flashing it on your phone.
Step 7
Now get yourself back to the main menu by pressing back button and then reboot your Android phone.
Step 8
After this, you’ll have CyanogenMod 10.1 ROM installed over your Samsung Galaxy S3 I9300.
In this article we
will tell you how to flash cyanogenmod 10.1 M2 on nexus S I9020 with
android 4.2.2 jelly bean ROM. Here’s the procedure.
CyanogenMod 10.1 M2 Android v4.2.2 Jelly Bean provides an immense
exhilaration to those Nexus S I9020 users desiring to enjoy the features
of Jelly Bean 4.2.2 ROM. CyanogenMod, also known as simply CM, is
undoubtedly the most greatly acknowledged unauthorized Android firmware,
and day-by-day they are increasing their compatibility with numerous
old and freshly arriving Android devices from different manufacturers,
including our Nexus S I9020.
Many reviews show that CyanogenMod provides much more facilities than
the official Android firmware. Installing CyanogenMod 10.1 M2 Android
4.2.2 Jelly Bean on your Nexus S I9020 will enable its user to sustain
in the Jelly Bean environment.
So in this tutorial we will be showing you an installation guide
regarding using CyanogenMod 10.1 M2 Jelly Bean 4.2.2 ROM on Nexus S I9020. Just follow the simple steps given below:
Disclaimer
This tutorial will definitely work when using Nexus S I9020 only.
While working of it on others is not yet confirmed. On applying this
installation to another model or device may give an unwanted result.
While applying this update we will not be responsible if anything occurs
to your device, so continue at your own risk.
Pre-Requisite
For successful completion of this rooting process charge your phone up to a minimum of 75% battery.
You must take a back-up of all your personnel items and other
impotent data, such as Call Logs, SMS, Contacts, Audios, Images, Videos,
APN (Access Point Names) settings, Bookmarks, MMS settings, on your
phone.
One must install a custom recovery image particularly for his
Android device. To do this, ClockworkMod Recovery should be downloaded
using the Internet.
If you have not, then you must unlock your Android device’s Bootloader.
Steps for Flashing/Installing CM10.1 M2 Android 4.2.2 Jelly Bean ROM on Nexus S I9020
Step 1
From your Android device disconnect & remove the memory card and
insert it in your Computer using a card reader. You must not use USB
cable, since CyanogenMod do not work properly through USBs.
Step 2
Now do repartition of memory card, by just doing right click on the existing partition, choose Resize
option, and then apply the sufficient amount of space towards your new
partition. Make your new partition as your primary partition of Ext4
file system. Press the Apply option & remove your memory card now.
Step 3
Using the Internet, download: Android 4.2.2 CM10.1 M2 ROM for Nexus S I9020.zip
file and Google Apps in your Computer. Again reinsert it in the PC and
then copy the above downloaded zip file in a folder named as “root” under your SD Card. Don’t run or try to open this file, just copy it in the folder.
Step 4
Now, remove your memory card from the Computer. Then shut-down your
Android smartphone and then again insert back memory card in the phone.
Step 5
Now, enter into the Recovery Mode. For this just press the Down Volume & Home button simultaneously, and while pressing these buttons press down your Power button at the same time.
Step 6
Since you are now in the Recovery Mode, select the “install zip from SD card” option, and then select the “choose zip from SD card” option to browse into your SD Card. Now, navigate up to the downloaded “Android 4.2.2 CM10.1 M2 ROM for Nexus S I9020.zip” file for flashing it on your phone.
Step 7
Now get yourself back to the main menu by pressing back button and then reboot your Android phone.
Step 8
After this, you’ll have CyanogenMod 10.1 M2 ROM installed over your Android device.
In this article we
will tell you how to flash cyanogenmod 10.1 M2 on samsung google nexus
10 P8110 with android 4.2.2 jelly bean JDQ39. Here’s the procedure.
CyanogenMod 10.1 M2
Android v4.2.2 Jelly Bean provides an immense exhilaration to Samsung
Google Nexus 10 P8110 users desiring to enjoy the features of Jelly Bean
4.2.2 ROM. CyanogenMod, also known as simply CM, is undoubtedly the
most greatly acknowledged unauthorized Android firmware, and day-by-day
they are increasing their compatibility with numerous old and freshly
arriving Android devices from different manufacturers, including our
Samsung Google Nexus 10 P8110.
Many reviews show that
CyanogenMod provides much more facilities than the official Android
firmware. Installing CyanogenMod 10.1 M2 Android 4.2.2 Jelly Bean JDQ39
on your Samsung Google Nexus 10 P8110 will enable its user to sustain in
the Jelly Bean environment.
Disclaimer
This tutorial will definitely work when using Samsung Google Nexus 10
P8110 only. While working of it on others is not yet confirmed. On
applying this installation to another model or device may give an
unwanted result. While applying this update we will not be responsible
if anything occurs to your device, so continue at your own risk.
Pre-Requisite
For successful completion of this rooting process charge your phone up to a minimum of 75% battery.
You must take a back-up of all your personnel items and other
impotent data, such as Call Logs, SMS, Contacts, Audios, Images, Videos,
APN (Access Point Names) settings, Bookmarks, MMS settings, on your
phone.
One must install a custom recovery image particularly for his
Android device. To do this, ClockworkMod Recovery should be downloaded
using the Internet.
If you have not, then you must unlock your Android device’s Bootloader.
Steps for Flashing/Installing CM10.1 M2 Android 4.2.2 Jelly Bean JDQ39 ROM on Samsung Google Nexus 10 P8110
Step 1
From your Android device disconnect & remove the memory card and
insert it in your Computer using a card reader. You must not use USB
cable, since CyanogenMod do not work properly through USBs.
Step 2
Now do repartition of memory card, by just doing right click on the existing partition, choose Resize
option, and then apply the sufficient amount of space towards your new
partition. Make your new partition as your primary partition of Ext4
file system. Press the Apply option & remove your memory card now.
Step 3
Using the Internet, download: Android 4.2.2 CM10.1 M2 for Samsung Google Nexus 10 P8110.zip
file and Google Apps in your Computer. Again reinsert it in the PC and
then copy the above downloaded zip file in a folder named as “root” under your SD Card. Don’t run or try to open this file, just copy it in the folder.
Step 4
Now, remove your memory card from the Computer. Then shut-down your
Android smartphone and then again insert back memory card in the phone.
Step 5
Now, enter into the Recovery Mode. For this just press the Down Volume & Home button simultaneously, and while pressing these buttons press down your Power button at the same time.
Step 6
Since you are now in the Recovery Mode, select the “install zip from SD card” option, and then select the “choose zip from SD card” option to browse into your SD Card. Now, navigate up to the downloaded “Android 4.2.2 CM10.1 M2 for Samsung Google Nexus 10 P8110.zip” file for flashing it on your phone.
Step 7
Now get yourself back to the main menu by pressing back button and then reboot your Android phone.
Step 8
After this, you’ll have CyanogenMod 10.1 M2 ROM installed over your Android device.
In this article we
will tell you how to flash cyanogenmod 10.1 M2 on LG Google Nexus 4 E960
android 4.2.2 jelly bean JDQ39. Here’s the procedure.
CyanogenMod 10.1 M2 Android v4.2.2 Jelly Bean provides an immense
exhilaration to those LG Google Nexus 4 E960 users desiring to enjoy the
features of Jelly Bean 4.2.2 ROM. CyanogenMod, also known as simply CM,
is undoubtedly the most greatly acknowledged unauthorized Android
firmware, and day-by-day they are increasing their compatibility with
numerous old and freshly arriving Android devices from different
manufacturers, including our LG Google Nexus 4 E960.
Many reviews show that CyanogenMod provides much more facilities than
the official Android firmware. Installing CyanogenMod 10.1 M2 Android
4.2.2 Jelly Bean JDQ39 on your LG Google Nexus 4 E960 will enable its
user to sustain in the Jelly Bean environment.
So in this tutorial we will be showing you an installation guide
regarding using CyanogenMod 10.1 M2 Jelly Bean 4.2.2 JDQ39 ROM on LG
Google Nexus 4 E960. Just follow the simple steps given below:
Disclaimer
This
tutorial will definitely work when using LG Google Nexus 4 E960 only.
While working of it on others is not yet confirmed. On applying this
installation to another model or device may give an unwanted result.
While applying this update we will not be responsible if anything occurs
to your device, so continue at your own risk.
Pre-Requisite
For successful completion of this rooting process charge your phone up to a minimum of 75% battery.
You must take a back-up of all your personnel items and other
impotent data, such as Call Logs, SMS, Contacts, Audios, Images, Videos,
APN (Access Point Names) settings, Bookmarks, MMS settings, on your
phone.
One must install a custom recovery image particularly for his
Android device. To do this, ClockworkMod Recovery should be downloaded
using the Internet.
If you have not, then you must unlock your Android device’s Bootloader.
Steps for installing CM10.1 M2 Android 4.2.2 Jelly Bean JDQ39 ROM for LG Google Nexus 4 E960
Step 1
From your Android device disconnect & remove the memory card and
insert it in your Computer using a card reader. You must not use USB
cable, since CyanogenMod do not work properly through USBs.
Step 2
Now do repartition of memory card, by just doing right click on the existing partition, choose Resize
option, and then apply the sufficient amount of space towards your new
partition. Make your new partition as your primary partition of Ext4
file system. Press the Apply option & remove your memory card now.
Step 3
Using the Internet, download: Android 4.2.2 CM10.1 M2 ROM for LG Google Nexus 4 E960.zip
file and Google Apps in your Computer. Again reinsert it in the PC and
then copy the above downloaded zip file in a folder named as “root” under your SD Card. Don’t run or try to open this file, just copy it in the folder.
Step 4
Now, remove your memory card from the Computer. Then shut-down your
Android smartphone and then again insert back memory card in the phone.
Step 5
Now, enter into the Recovery Mode. For this just press the Down Volume & Home button simultaneously, and while pressing these buttons press down your Power button at the same time.
Step 6
Since you are now in the Recovery Mode, select the “install zip from SD card” option, and then select the “choose zip from SD card” option to browse into your SD Card. Now, navigate up to the downloaded “Android 4.2.2 CM10.1 M2 ROM for LG Google Nexus 4 E960.zip” file for flashing it on your phone.
Step 7
Now get yourself back to the main menu by pressing back button and then reboot your Android phone.
Step 8
After this, you’ll have CyanogenMod 10.1 M2 ROM installed over your Android device.
Samsung Galaxy Y is featured with 830 MHz ARM 6 Processor, a RAM of
just 290 MB, and a 32 GB upgradable storage. Like the previous Samsung’s
Smartphones, it has also created a large user base or fan base. With an
affordable price range, they also have provided some really good
features with an elegant design and stunning look
Android Smartphone are an excellent way to take all your private and
important files, images, data, and all other imperative data with you.
Thus we can declare that it is one of the finest gadgets in our pocket
which has plenty of information regarding you.
So in this tutorial we will be showing you how to increase the RAM of
your Samsung Galaxy Y. Just follow the simple steps given below:
Disclaimer
This tutorial will definitely work when using Samsung Galaxy Y only.
While working of it on others is not yet confirmed. On applying this
installation to another model or device may give an unwanted result.
While applying this update we will not be responsible if anything occurs
to your device, so continue at your own risk.
Pre-Requisite
For successful completion of this rooting process charge your phone up to a minimum of 75% battery.
You must take a back-up of all your personnel items and other
impotent data, such as Call Logs, SMS, Contacts, Audios, Images, Videos,
APN (Access Point Names) settings, Bookmarks, MMS settings, on your
phone.
One must install a custom recovery image particularly for his
Android device. To do this, ClockworkMod Recovery should be downloaded
using the Internet.
If you have not, then you must unlock your Android device’s Bootloader.
You must enable USB Debugging mode on your Samsung Galaxy Y. Just follow, Settings–>Applications–>Development–>USB debugging. There select the USB Debugging icon.
Steps for Increasing RAM of Samsung Galaxy Y
Step 1
Firstly, download MiniTool Partition Wizard app to your computer and then install it. You may download it by just clicking it here. Step 2
From your Android device disconnect & remove the memory card and
insert it in your Computer using a card reader. You must not use USB
cable, since this app may not work properly through USBs. Step 3
Now run the above downloaded app on your computer. Step 4
Now click on SD card and there do the right click on the “Option” icon. Then select the “Delete” option for a complete deletion of data on your SD card. Step 5
Now again do the right click on the “Option” icon. Then select the “Create New” option. Step 6
Now, choose the file type as FAT32 and there allocate the space with such an amount that you believe you’ll be utilizing. Step 7
Next, again apply the same procedure as above and choose “Create as: Primary”, so to create a new partition (external). This space will be utilized for storing downloaded apps. Step 8
Finally, select the “Apply” option to finish it. After this you may insert your SD card into your Samsung Galaxy Y. Step 9
Now, download Swapper2 app to your computer and then install it. You may download it by just clicking it here. Step 10
Next, run the above downloaded app on your computer. Step 11
Now, allocate the Swap size as shown below:
Minimum Size: 10MB
Maximum Size: 256MB
But the recommended size is 32MB (you may choose whatever you want) Step 12
Now, allocate the Swapiness as shown below:
Maximum: 100MB
Default System: 60MB
But the recommended is 10MB (you may choose whatever you want) Step 13
Now, select the “Safe Unmount” and “Safe Remount” options. Step 14
Finally, turn on the Swap by clicking the “ON” option and then reboot your Samsung Galaxy Y. Now we hope that you understand how to increase RAM of samsung galaxy y. Finished!
Samsung Galaxy Ace is featured with 832 MHz Processor, a RAM of 512
MB, and a 32 GB upgradable storage. Like the previous Samsung’s
Smartphones, it has also created a large user base or fan base. With an
affordable price range, they also have provided some really good
features with an elegant design and stunning look
Android Smartphone are an excellent way to take all your private and
important files, images, data, and all other imperative data with you.
Thus we can declare that it is one of the finest gadgets in our pocket
which has plenty of information regarding you.
So in this tutorial we will be showing you how to increase the
internal memory of your Samsung Galaxy Ace. Just follow the simple steps
given below
Disclaimer
This tutorial will definitely work when using Samsung Galaxy Ace
only. While working of it on others is not yet confirmed. On applying
this installation to another model or device may give an unwanted
result. While applying this update we will not be responsible if
anything occurs to your device, so continue at your own risk.
Pre-Requisite
For successful completion of this rooting process charge your phone up to a minimum of 75% battery.
You must take a back-up of all your personnel items and other
impotent data, such as Call Logs, SMS, Contacts, Audios, Images, Videos,
APN (Access Point Names) settings, Bookmarks, MMS settings, on your
phone.
One must install a custom recovery image particularly for his
Android device. To do this, ClockworkMod Recovery should be downloaded
using the Internet.
If you have not, then you must unlock your Android device’s Bootloader.
You must enable USB Debugging mode on your Samsung Galaxy Ace. Just follow, Settings–>Applications–>Development–>USB debugging. There select the USB Debugging icon.
Steps for Increasing Internal Memory of Samsung Galaxy Ace
Step 1
Firstly, download MiniTool Partition Wizard app to your computer and then install it. You may download it by just clicking it here.
Step 2
From your Android device disconnect & remove the memory card and
insert it in your Computer using a card reader. You must not use USB
cable, since this app may not work properly through USBs.
Step 3
Now run the above downloaded app on your computer.
Step 4
Now click on SD card and there do the right click on the “Option” icon. Then select the “Delete” option for a complete deletion of data on your SD card.
Step 5
Now again do the right click on the “Option” icon. Then select the “Create New” option.
Step 6
Now, choose the file type as FAT32 and there allocate the space with such an amount that you believe you’ll be utilizing.
Step 7
Next, again apply the same procedure as above and choose “Create as: Primary”, so to create a new partition (external). This space will be utilized for storing downloaded apps.
Step 8
Finally, select the “Apply” option to finish the process. After this you may insert your SD card into your Samsung Galaxy Ace.
CyanogenMod 10.1 M2 Android v4.3 Jelly Bean provides an immense
exhilaration to those LG Google Nexus 4 E960 users desiring to enjoy the
features of Jelly Bean 4.3 ROM. CyanogenMod, also known as simply CM,
is undoubtedly the most greatly acknowledged unauthorized Android
firmware, and day-by-day they are increasing their compatibility with
numerous old and freshly arriving Android devices from different
manufacturers, including our LG Google Nexus 4 E960. Many reviews show
that CyanogenMod provides much more facilities than the official Android
firmware. Installing CyanogenMod 10.1 M2 Android 4.3 Jelly Bean JDQ39
on your LG Google Nexus 4 E960 will enable its user to sustain in the
Jelly Bean environment.
So in this tutorial we will be showing you an installation guide
regarding using CyanogenMod 10.1 M2 Jelly Bean 4.3 JDQ39 ROM on LG
Google Nexus 4 E960. Just follow the simple steps given below:
Disclaimer:
This tutorial will definitely work when using LG Google Nexus 4 E960
only. While working of it on others is not yet confirmed. On applying
this installation to another model or device may give an unwanted
result. While applying this update we will not be responsible if
anything occurs to your device, so continue at your own risk.
Pre-Requisite:
For successful completion of this rooting process charge your phone up to a minimum of 75% battery.
You must take a back-up of all your personnel items and other
impotent data, such as Call Logs, SMS, Contacts, Audios, Images, Videos,
APN (Access Point Names) settings, Bookmarks, MMS settings, on your
phone.
One must install a custom recovery image particularly for his
Android device. To do this, ClockworkMod Recovery should be downloaded
using the Internet.
If you have not, then you must unlock your Android device’s Bootloader.
Steps for installing CM10.1 M2 Android 4.3 Jelly Bean JDQ39 ROM for LG Google Nexus 4 E960:
Step 1
From your Android device disconnect & remove the memory card and
insert it in your Computer using a card reader. You must not use USB
cable, since CyanogenMod do not work properly through USBs.
Step 2
Now do repartition of memory card, by just doing right click on the existing partition, choose Resize
option, and then apply the sufficient amount of space towards your new
partition. Make your new partition as your primary partition of Ext4
file system. Press the Apply option & remove your memory card now.
Step 3
Using the Internet, download: Android 4.3 CM10.1 M2 ROM for LG Google Nexus 4 E960.zip
file and Google Apps in your Computer. Again reinsert it in the PC and
then copy the above downloaded zip file in a folder named as “root” under your SD Card. Don’t run or try to open this file, just copy it in the folder.
Step 4
Now, remove your memory card from the Computer. Then shut-down your
Android smartphone and then again insert back memory card in the phone.
Step 5
Now, enter into the Recovery Mode. For this just press the Down Volume & Home button simultaneously, and while pressing these buttons press down your Power button at the same time.
Step 6
Since you are now in the Recovery Mode, select the “install zip from SD card” option, and then select the “choose zip from SD card” option to browse into your SD Card. Now, navigate up to the downloaded “Android 4.3 CM10.1 M2 ROM for LG Google Nexus 4 E960.zip” file for flashing it on your phone.
Step 7
Now get yourself back to the main menu by pressing back button and then reboot your Android phone.
Step 8
After this, you’ll have CyanogenMod 10.1 M2 ROM installed over your Android device.
In this tutorial we will guide you step-by-step on how to install ClockworkMod recovery on Samsung Galaxy Note 2 i317.
ClockworkMod, also known as simply CWM, is undoubtedly the most
greatly acknowledged recovery tool for custom Android firmware
installation, and day-by-day they are increasing their compatibility
with numerous old and freshly arriving Android devices from different
manufacturers, including our AT&T Samsung Galaxy Note 2 SGH-I317.
This touch-based recovery tool is far better than that ordinary
non-touch based ClockworkMod Recovery, since it provides easiness during
entering into recovery mode via four virtual buttons and eliminating
the usage of physical buttons of device. However, one may still use
those physical buttons, if he desire so. Many reviews show that touch
based ClockworkMod Recovery provides much more facilities than the
non-touch based ClockworkMod Recovery.
AT&T Samsung Galaxy Note 2 SGH-I317 is featured with 1.6GHz
quad-core Exynos Processor, a RAM of 2 GB, and 16 GB Internal Storage.
Like the previous Samsung’s smartphones, it has also created a large
user base or fan base. With an affordable price range, they also have
provided some really good features with an elegant design and stunning
look.
So in this tutorial we will be showing you a tutorial how to
flash/install ClockworkMod touch recovery 6.0.3.1 image on AT&T
Samsung Galaxy Note 2 SGH-I317. Just follow the simple steps given
below:
Disclaimer:
This tutorial will definitely work when using AT&T Samsung Galaxy
Note 2 SGH-I317 only. While working of it on others is not yet
confirmed. On applying this installation to another model or device may
give an unwanted result. While applying this update we will not be
responsible if anything occurs to your device, so continue at your own
risk.
Pre-Requisite:
For successful completion of this process charge your phone up to a minimum of 75% battery.
You must take a back-up of all your personnel items and other
impotent data, such as Call Logs, SMS, Contacts, Audios, Images, Videos,
APN (Access Point Names) settings, Bookmarks, MMS settings, on your
phone.
If you have not, then you must unlock your Android device’s Bootloader.
You must enable USB Debugging mode on your AT&T Samsung Galaxy Note 2 SGH-I317. Just follow, Settingsà Applicationsà Developmentà USB debugging. There select the USB Debugging icon.
You must have rooted down your AT&T Samsung Galaxy Note 2 SGH-I317 before applying this tutorial.
Please ensure that all your security suites, like firewall and
antivirus, on AT&T Samsung Galaxy Note 2 SGH-I317 must be disabled.
Steps for Flashing ClockworkMod Touch Recovery 6.0.3.1 Image on AT&T Samsung Galaxy Note 2 SGH-I317:
Step 1
Firstly, download Odin3 v3.04.zipfiles to your computer and then install the application after getting it extracted.
Now, it should be noted here that we have .img file in our hand, but
since Odin can flash .tar file only, so we have to convert this .img
file to a .tar file. For Windows, converting an .img file into .tar file
is a very complex procedure, so we have prepared an easy solution,
following which you can very easily use your downloaded recovery .img
file in Odin. For that you just have to run the following commands on
some Linux partition to convert your .img file into .tar.md5 file:
Step 3
After converting the file, switch off your phone to enter into the Download Mode. For this just press the Down Volume button & Home button simultaneously, and while pressing these buttons press down your Power button at the same time.
Step 4
Now start Odin on your PC and then connect your AT&T Samsung Galaxy Note 2 SGH-I317 to it through USB.
Step 5
After the successful connection, wait for a while and then you’ll see
an ID:COM box with its COM port id will swap into yellow colour.
Step 6
Now under the Odin’s settings, select the F. Reset Time and Auto Reboot options.
1. Through installing CyanogenMod on your Android phone you can get
full access into your phone’s internal file system, and thus you can
also make potent modifications in them.
2. CyanogenMod will also benefit your device by improving the
performance and also by enhancing the speed of operating system of your
Android device.
3. One may feel some sort of irritation when he gets undesired
default apps in his Android device by the manufacturers and that too
without any uninstall option. In this case, if you have CyanogenMod you
can easily remove the unwanted apps from your device.
4. It will surely increase battery pack up of Android devices.
5. Installing CyanogenMod will also enhance the visual experience of your Android device.
CyanogenMod Gapps
Since official Google apps are bundled only in official ROMs and not
in custom ROMs (due to licensing issues), therefore after flashing a
custom ROM on your Android device, you need to install GApps (Google
Apps) separately particularly for your Android version only.
GApps consists of various apps, such as GMail, Google Play Store,
Google Search, Google Backup Transport, Gtalk, Google Calendar, Google
Map, Car Home, YouTube, Google Music, Google Sync, Google Docs, and
Google Voice, etc.
Here, you can get all the CyanogenMod Gapps (Google Apps) for your Android device, by clicking it here.
Or, simply go the specific CyanogenMod Gapps.
By installing CyanogenMod firmware on your Android device, you can
achieve many benefits by very easily performing the following functions:
Lockscreen Gestures
Phone Goggles:
OpenVPN
Incognito Mode
Themes Support
DSP Equalizer
Disclaimer against installing CyanogenMod ROM
Due to installation of CyanogenMod ROM, your Android device will lose
its official Warranty and while flashing CyanogenMod firmware on your
device, no one will be responsible if anything occurs to your Android
device, so continue at your own risk.
Pre-Requisite of installing CyanogenMod ROM
For successful completion of installing/flashing CyanogenMod ROM
charge your Android device up to a minimum of 75% – 85% battery.
You must take a back-up of all your personnel items and other
impotent data, such as Call Logs, SMS, Contacts, Audios, Images, Videos,
APN (Access Point Names) settings, Bookmarks, MMS settings, on your
Android device.
If you have not, then you must unlock your device’s Bootloader.
You must have rooted down your Android device before applying this tutorial.
Please ensure that all your security suites, like firewall and
antivirus, on your Android device as well as on computer must be
disabled.
You must enable USB Debugging mode on your Android device. Just follow, Settings-> Applications-> Development-> USB debugging. There select the USB Debugging icon.
You must download and install all the required USB drivers for your Android device.
One must install a custom recovery image particularly for his
Android device. To do this, you can download ClockworkMod Recovery or
TWRP Recovery and then install it over your Android based gadget.


 N7100 Copy MTK Android Factory Rom


 (
(


 I9020. Just follow the simple steps given below:


